树莓派相关
关于vim
树莓派自带的vim直接使用会有一些问题,可以尝试进行安装
sudo apt-get install vim |
更换软件源
编辑
sudo vim /etc/apt/sources.list |
更改为
#deb http://raspbian.raspberrypi.org/raspbian/ buster main contrib non-free rpi |
编辑
sudo vim /etc/apt/sources.list.d/raspi.list |
更改为
#deb http://archive.raspberrypi.org/debian/ buster main |
即注释了原有源,修改源为国内的Tsinghua镜像
可用镜像可以查看https://www.raspbian.org/RaspbianMirrors
更新软件源列表 sudo apt-get update
更新软件sudo apt-get upgrade
参考:
安装nginx
nginx 可用apt-get命令直接进行安装
sudo apt-get install nginx |
安装成功后,默认nginx已启动(重启后依然运行中,说明已经开机自启),在局域网直接访问树莓派ip,即可看到nginx的欢迎界面
Welcome to nginx! |
nginx -h查看帮助
nginx version: nginx/1.14.2 |
这里比较常用的命令是nginx -s [stop, quit, reopen, reload], 用于启动或停止nginx服务
从帮助文件里可以知道nginx的默认配置文件在/etc/nginx/nginx.conf, 网站文件目录在/var/www/html/
播放音频
1.使用aplay播放
aplay /usr/share/sounds/alsa/Rear_Right.wav |
不支持MP3
2.使用omxplayer播放
omxplayer Taylor\ Swift\ -\ Safe\ And\ Sound.mp3 |
快捷键
- 左键 - 后退10s
- 右键 - 前进10s
- 上键 - 前进10min
- 下键 - 后退10min
- 减号 - 降低音量
- 加号 - 提高音量
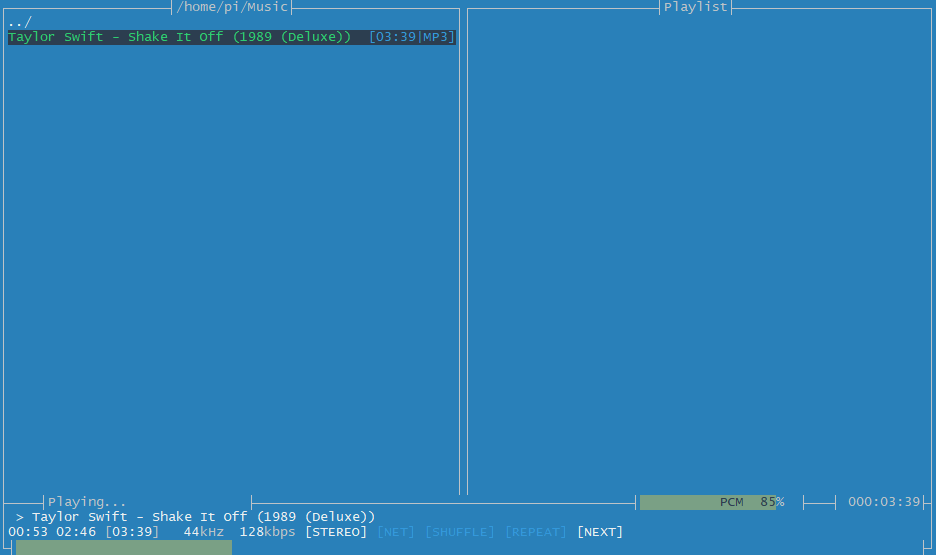
3.使用音乐播放器moc播放
moc是music on console的意思
sudo apt-get install moc |
执行mocp命令即可运行播放器
查看系统运行状态
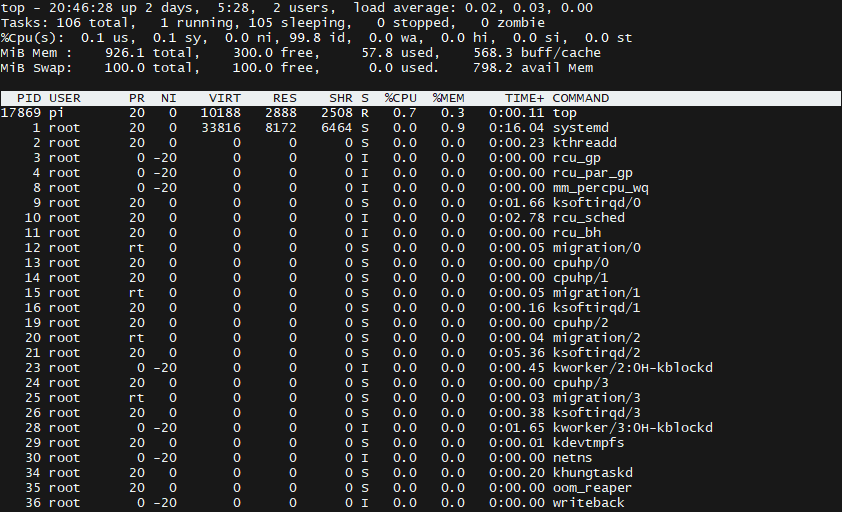
1.使用top命令
top |
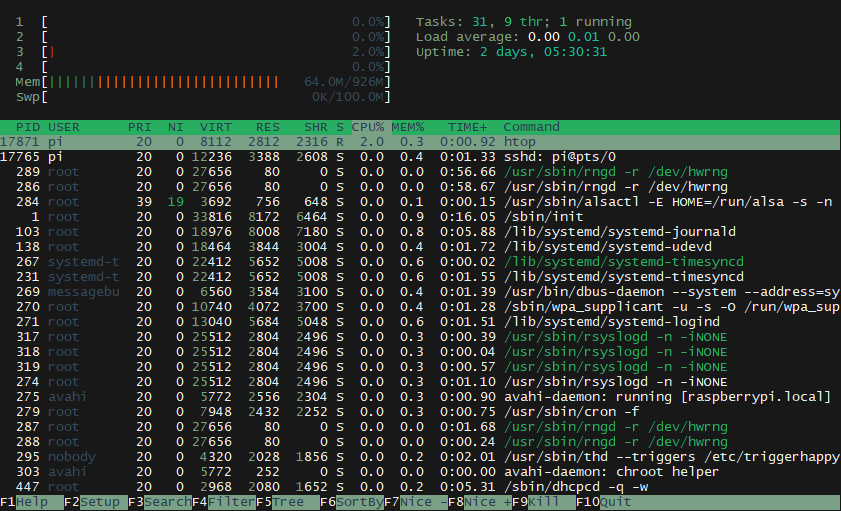
2.使用htop命令
htop |
使用ffmpeg命令录制视频
插上usb摄像头后
执行lsusb查看设备

其中的Apple, Inc. Built-in iSight便是usb摄像头
查看ffmpeg官方文档这里有说如何获取音频视频到文件
6.1 Video and Audio grabbing
If you specify the input format and device then ffmpeg can grab video and audio directly.
ffmpeg -f oss -i /dev/dsp -f video4linux2 -i /dev/video0 /tmp/out.mpg
Or with an ALSA audio source (mono input, card id 1) instead of OSS:
ffmpeg -f alsa -ac 1 -i hw:1 -f video4linux2 -i /dev/video0 /tmp/out.mpg
Note that you must activate the right video source and channel before launching ffmpeg with any TV viewer such as xawtv by Gerd Knorr. You also have to set the audio recording levels correctly with a standard mixer.
树莓派上没有录音设备,所以就不录音频,只录视频画面
ffmpeg -f video4linux2 -i /dev/video0 -t 10 out.mpg |
录制10s视频并保存到当前目录的out.mpg
这里保存的是mpg格式文件,普通播放器可能无法播放,将其转为常见的mp4格式
ffmpeg -i out.mpg out.mp4 |
rtmp服务器推流
1.rtmp服务
创建一个文件目录, npm init将该目录初始化一个项目目录
安装node-media-server
npm install node-media-server |
新建主程序文件vim app.js
const NodeMediaServer = require('node-media-server') |
运行rtmp服务node app.js

2.前端
新建index.html
|
3.ffmpeg命令推流
本地文件推流
ffmpeg -re -i Taylor\ Swift\ -\ Shake\ It\ Off.mp4 -c copy -f flv rtmp://localhost/live/67373 |

摄像头推流
ffmpeg -i /dev/video0 -c:v libx264 -preset superfast -tune zerolatency -c:a aac -ar 44100 -f flv rtmp://localhost/live/67373 |
但是有很高的延迟,不知为什么
连接蓝牙音箱
使用bluetoothctl进入蓝牙
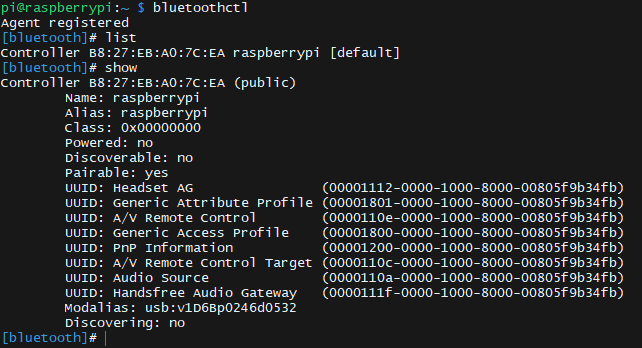
list用来列出蓝牙设备show用来展示蓝牙设备信息
启用蓝牙power on

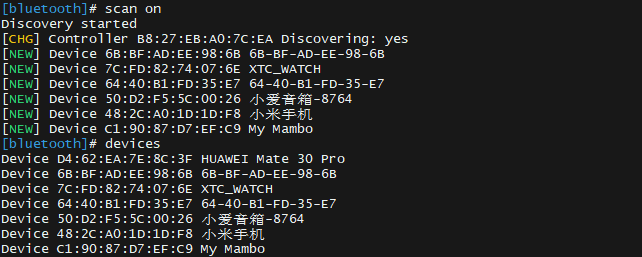
扫描蓝牙scan on
查看扫描到蓝牙设备devices
信任设备trust(下次系统重启会自动进行连接)

配对pair

连接connect

exit退出蓝牙界面
播放音频测试蓝颜音箱
aplay /usr/share/sounds/alsa/Rear_Right.wav |
发现还是只是在耳机输出,蓝牙音箱没有输出声音
这时需要添加配置文件~/.asoundrc, 这是文件是用来指定声音输出的(类似于图形界面选择声音输出至蓝牙)
vim ~/.asoundrc |
编辑该文件,没有则新建
pcm.!default { |
output - 音频输出
input - 音频输入(麦克风)
这里”30:21:D0:3E:1F:C1”是音箱mac地址
保存后重新播放,便可以将蓝牙音箱作为默认音频输出
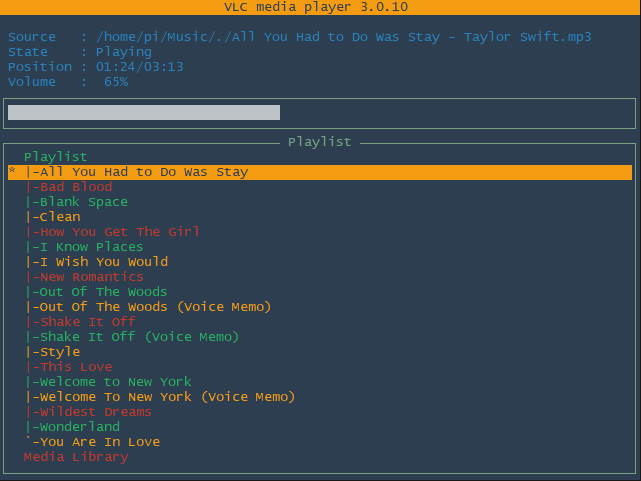
注意:这样配置,mocp播放器不能正常播放(可能不能正确识别树莓派下音频配置,推荐这种情况下使用树莓派自带的vlc media player作为音乐播放器)
vlc -I ncurses |
或者
vlc ~/Music |
添加指定目录到播放列表
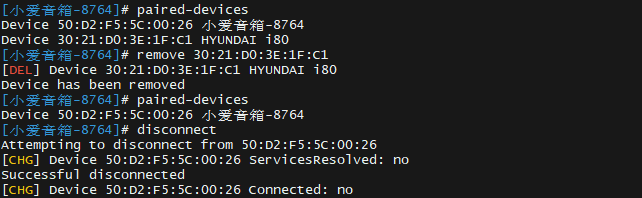
在未进行蓝牙扫描时,paired-devices命令可以用来查看已配对设备
remove命令可以用来指定移除指定设备的配对
disconnect用于断开当前蓝牙连接
查看CPU温度
cat /sys/class/thermal/thermal_zone0/temp |
所得值除以1000可以得到摄氏度单位值

也可以使用watch命令,刷新温度值,默认每两秒执行一次
watch cat /sys/class/thermal/thermal_zone0/temp |

设置静态ip
sudo vim /etc/dhcpcd.conf |
修改相应部分为
# Example static IP configuration: |
wifi 下类似 interface 为 wlan0
重启生效
修改主机名
sudo vim /etc/hostname |
修改其中的主机名,重启生效
挂载硬盘
查看磁盘分区
sudo fdisk -l |

挂载
sudo mount /dev/sda1 /media |
开机自动挂载
编辑
sudo vim /etc/fstab |
添加一行
/dev/sda1 /media ntfs defaults,noatime 0 0 |
重启
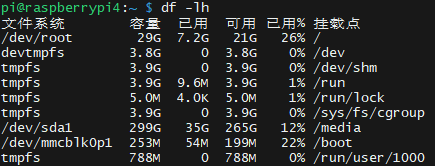
查看df -lh
安装samba服务
sudo apt-get install samba |
配置
sudo vim /etc/samba/smb.conf |
在配置文件中添加
[share] |
访问 \\192.168.1.4
如何添加用户
sudo smbpasswd -a pi |
这将添加pi用户,注意密码不要与pi用户密码设一样,另设密码
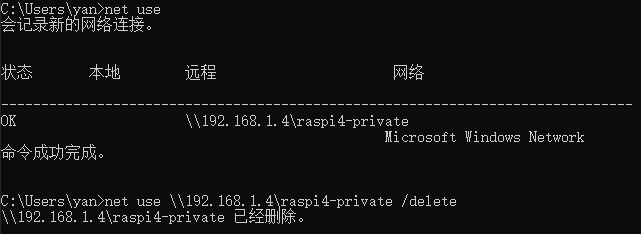
如果在Windows上登录过后,如何清除用户登录状态
在cmd命令行
net use |
上传文件速度在30M/s,下载速度105M/s,有线网络连接的情况下
磁盘读写速度测试
读取速度
sudo apt-get install hdparm |
sudo hdparm -t /dev/sda1 |
显示
/dev/sda1: |
写入速度
sudo dd if=/dev/zero of=/media/testw.dbf bs=512M count=1 |
回显
记录了1+0 的读入 |
如何关闭usb电源输出
安装uhubctl
sudo apt-get install libusb-1.0-0-dev |
pi4 需要uhubctl 2.4以上
查看usb电源状态
sudo uhubctl |
关闭电源
sudo uhubctl -l 1-1 -a 0 |